Deploying on Render
Premise
We believe a CMS should just run and you shoulnd't have to worry about infrastructure or managing hosting or anything like that. That's why we think running Yecco Docs on any kind of platform as a service (PaaS) is a good idea. In this example we're using Render, a PaaS that looks like Heroku.
Contents
One-click deployment
Render offers one-click deployments and we created a so called blueprint for that. Just click:
Deploy to RenderAfter deployment is done, you can login using the admin user and the generated password, as explained here.
Manual deployment
Deploying manually on Render is pretty easy and they provide decent documentation. To deploy Yecco Docs on Render, using manual configuration, you can use the following steps.
1. Create an account
Go to render.com and create an account.
2. Create a webservice
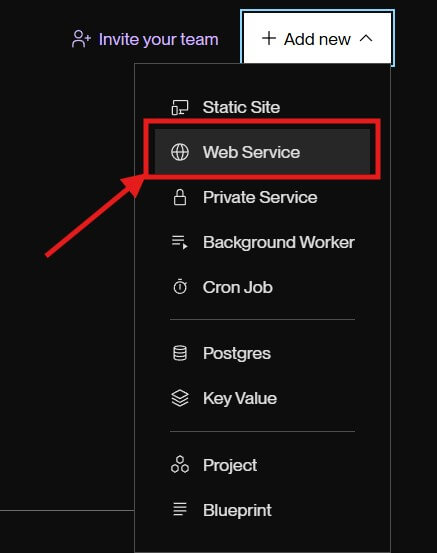
When you're on the Render dashboard, create a new webservice, by clicking the + Add new button and selecting Web Service. 
3. Select the Yecco Docs repo
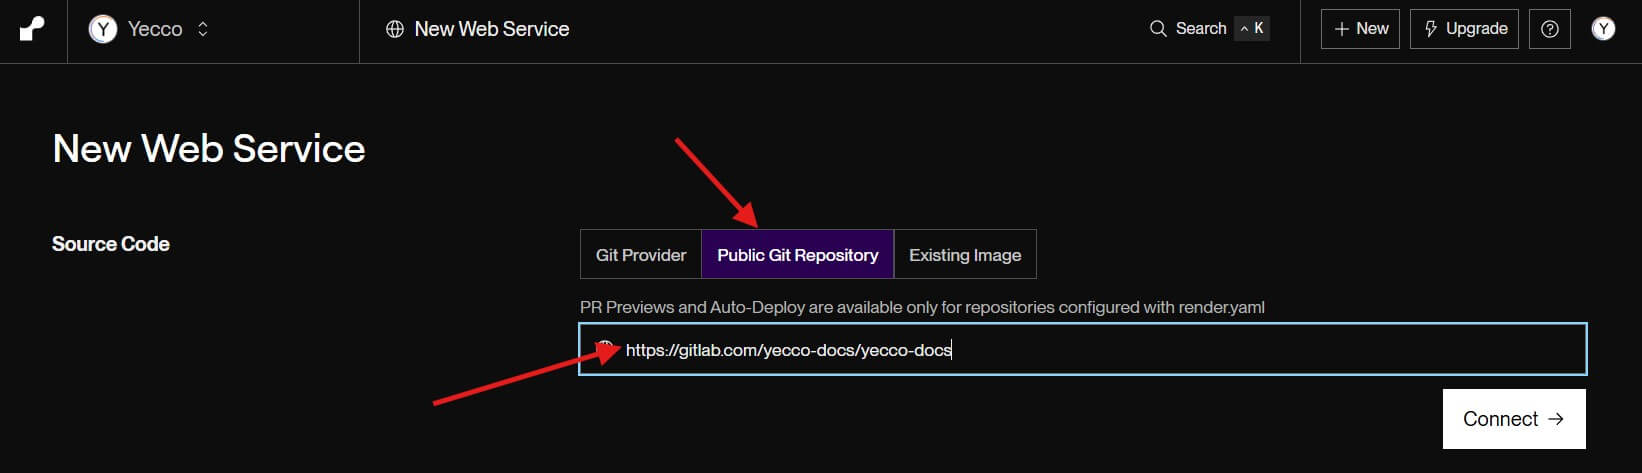
Now you will be asked to provide the source code for your new web service. Choose Public Git Repository and paste the url to Yecco Docs source code:
https://gitlab.com/yecco-docs/yecco-docs
4. Add the environment variables
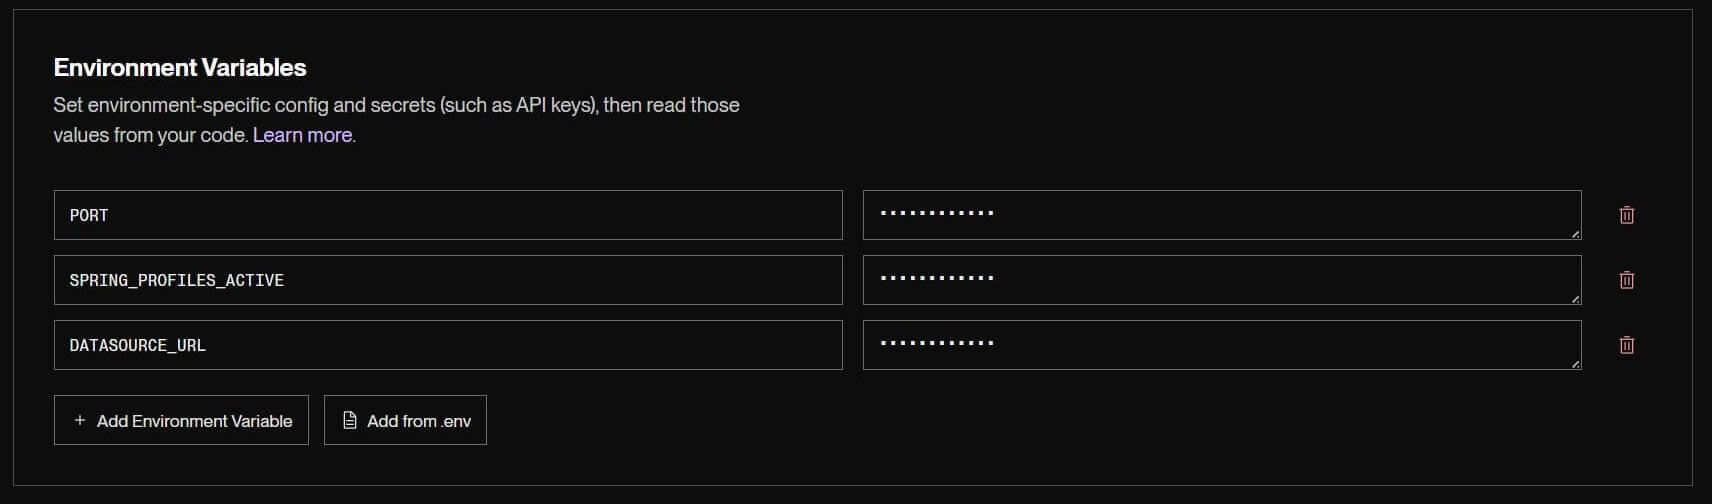
You need to set the following environment variables in order to run Yecco Docs.
PORT:8080
SPRING_PROFILES_ACTIVE:prd
DATASOURCE_URL:jdbc:h2:file:/yecco_storage/db;AUTO_SERVER=TRUE
5. Set-up storage
You can configure Yecco Docs to use any JDBC-compliant datasource like MySQL or PostgreSQL, but the cheapest set-up is to use an H2 database, that's simply stored in a single file. Click on Advanced to open the advanced settings and configure the file storage (Disk). Set the Mount path to
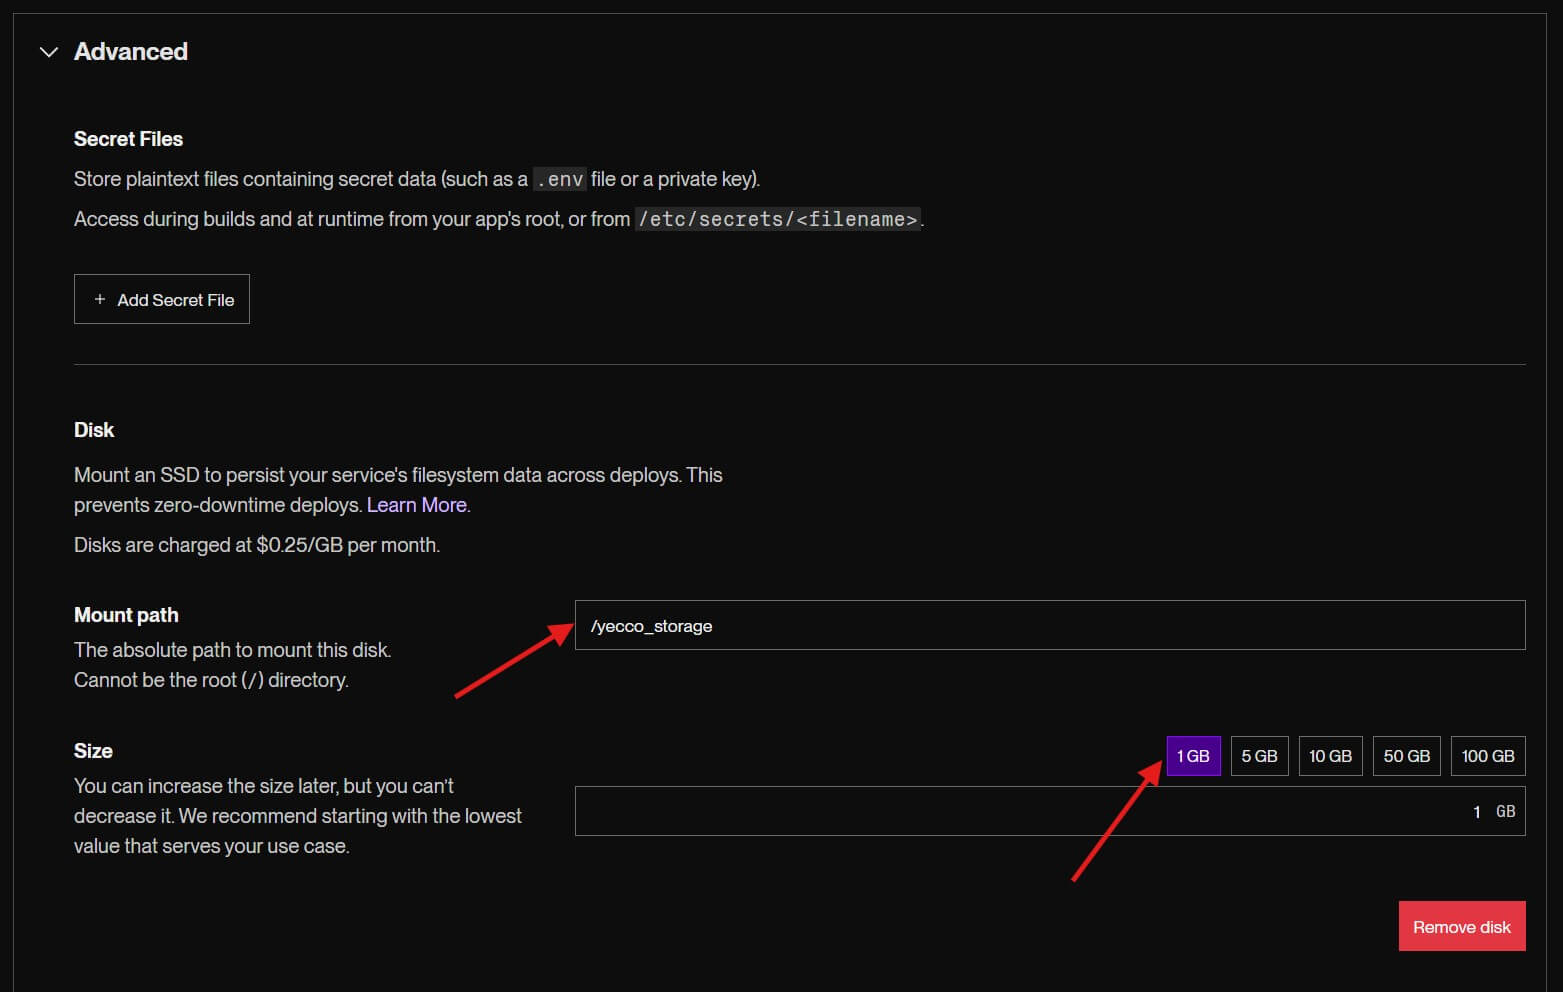
/yecco_storage
And select any size. 1GB is plenty to start with. You can always increase this size later.
6. Deploy
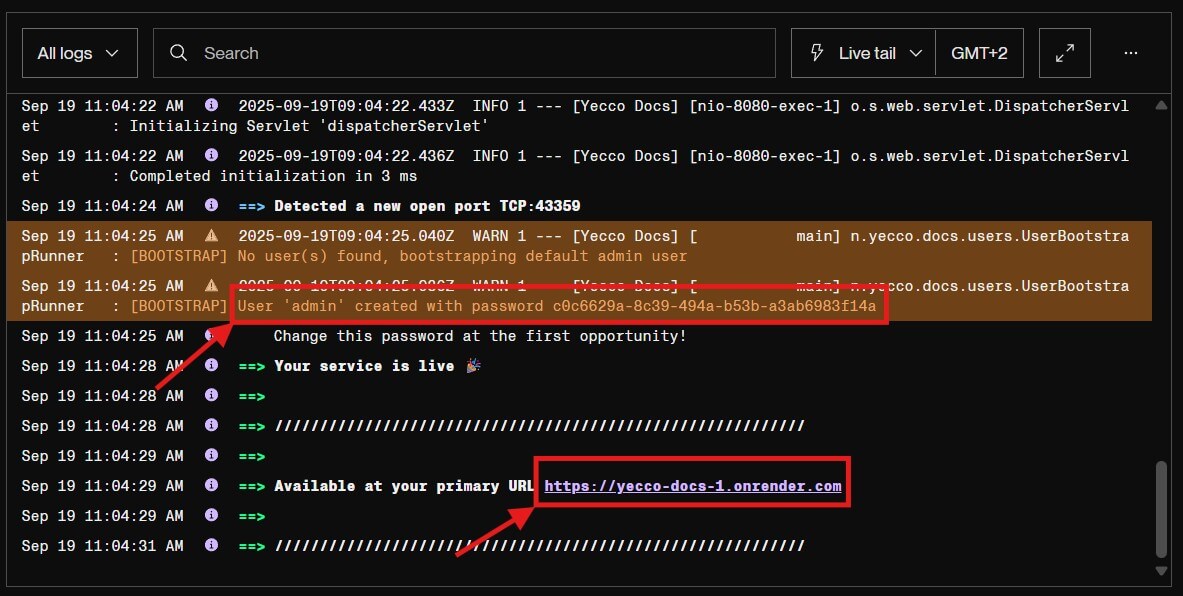
Now you can click on Deploy Web Service. You will be taken to the service' deployment logs where you can follow the deployment in realtime. This will take a few minutes. When the deployment is done, you will see the message: Your service is live 🎉. Right before that there's a line indicating that no users were previously present and an admin account has been created with a generated random password. You can use this password to login with the admin account. In the logs it also shows Available at your primary URL <url>. You can click that link to open the CMS and login using the username admin and the generated password you see in the logs.